DIY Tiki torch stand
The tiki torches can be placed on a concrete surface. You can place the tiki torches anywhere that will support them. This is because they can be easily moved from one place to another. If you put it on a concrete surface, it will last for several years. However, you should make sure that the base is stable and sturdy. In the end, the tiki torch stand will be more useful and decorative than it was before.
Another option for a DIY tiki torch stand is to use a glass bottle. These are lightweight and portable. They are perfect for camping trips. Moreover, they don’t take up too much space or weigh down the backpack. They can made from any glass bottle. They are very cheap and can used anywhere. This DIY tiki torch stand is easy to make and can used in the backyard, garden, and patio.
DIY Tiki torch stand make a copper tiki torch for modern look
If you prefer a more modern look, you can also make a copper tiki torch. This is a simple project that you can complete in your backyard. The finished product is a unique tiki torch that adds a touch of class and style to any area. These DIY tiki torches can also placed anywhere. You can attach them anywhere in your backyard or patio. They are great additions to your yard and can be displayed in your backyard.
Another DIY tiki torch stand can made from a wine bottle. These can positioned anywhere on the patio or in your yard. Unlike a traditional wooden stand, this one is lightweight, easy to move, and can mounted anywhere. It is also a good option for people who want to save money. There are no complicated steps and you’ll have a finished Tiki torch in no time.
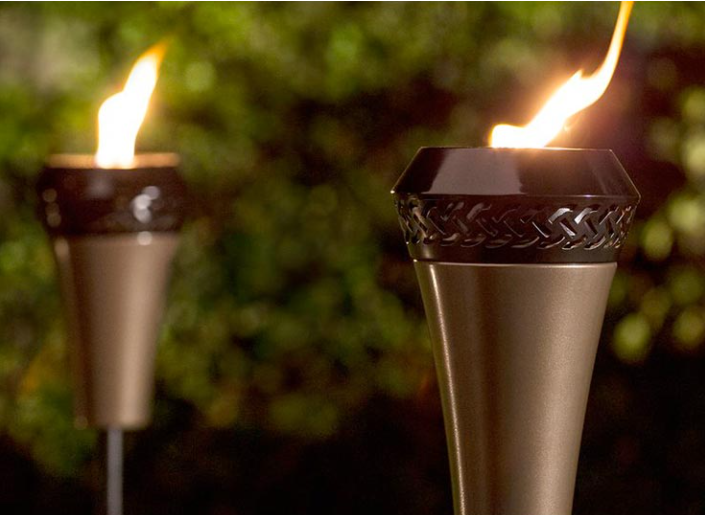
DIY Tiki torch stand. In this guide, you’ll learn how to make a simple yet eye-catching tiki torch stand. an easy tips
DIY Tiki torch stand. This DIY tiki torch stand is easy to make. For starters, you will need two sturdy sticks to support the torch and the Mason jar. Then you will need to attach the sticks with a split ring. Then, secure the two ends of the stick with a nut and bolt. Finally, attach the Tiki torches to the base. Then, you can place the candle in the lantern.
[caption id="attachment_17870" align="alignnone" width="707"] image source : youtube.com[/caption]
The first step is to gather the materials. You will need two regular Tiki torches, the oil containers, and a sturdy stand. The color of the fuel is important, so you should purchase a transparent bottle so you can see the colors. For a brighter look, you can use different colors of Tiki fuel. If you are using white candles, you can use colorful zip ties to blend the colors with the overall theme.
From a bamboo
Next, you will need two pieces of bamboo. For a taller stand, you will need to drill a hole in the bottom of the post. You should use a 1/2'' spade bit to make the hole in the bamboo. Once the hole is made, slide the wood dowel into the post and tighten the screws. If you are using a metal torch, you may need a larger wooden post with a longer shaft.
[caption id="attachment_17871" align="alignnone" width="700"] image source : safaffect.wordpress.com[/caption]
From old tin can
Another DIY Tiki torch stand can be made from old tin cans. If you are using a tin can, paint it with your favorite colors. You can even personalize it with a design drilled into the can. You can use a copper pipe as a holder or stand for a Tiki torch. You can even paint the bottle to match the landscape design! These two items can give your DIY Tiki torches an artsy touch.
[caption id="attachment_17872" align="alignnone" width="715"] image source : youtube.com[/caption]
DIY Tiki torch stand from two glass of bottle
The DIY Tiki torch stand is made from two glass bottles. Besides the glass bottles, you will also need a wood post. The bamboo post should be buried in the ground. Then, you will need to attach the plywood. Then, you need to use 3/4'' wood screws. You should remove the sticky label and the silkaflex construction adhesive. You will also need a wooden dowel to attach the bamboo post to the tiki torch.
[caption id="attachment_17873" align="alignnone" width="480"] image source : google.com[/caption]
The tiki torches can be placed on a concrete surface. You can place the tiki torches anywhere that will support them. This is because they can be easily moved from one place to another. If you put it on a concrete surface, it will last for several years. However, you should make sure that the base is stable and sturdy. In the end, the tiki torch stand will be more useful and decorative than it was before.
Another option for a DIY tiki torch stand is to use a glass bottle. These are lightweight and portable. They are perfect for camping trips. Moreover, they don't take up too much space or weigh down the backpack. They can made from any glass bottle. They are very cheap and can used anywhere. This DIY tiki torch stand is easy to make and can used in the backyard, garden, and patio.
DIY Tiki torch stand make a copper tiki torch for modern look
If you prefer a more modern look, you can also make a copper tiki torch. This is a simple project that you can complete in your backyard. The finished product is a unique tiki torch that adds a touch of class and style to any area. These DIY tiki torches can also placed anywhere. You can attach them anywhere in your backyard or patio. They are great additions to your yard and can be displayed in your backyard.
[caption id="attachment_17874" align="alignnone" width="705"] image source : google.com[/caption]
Another DIY tiki torch stand can made from a wine bottle. These can positioned anywhere on the patio or in your yard. Unlike a traditional wooden stand, this one is lightweight, easy to move, and can mounted anywhere. It is also a good option for people who want to save money. There are no complicated steps and you'll have a finished Tiki torch in no time.
DIY Tiki torch stand. In this guide, you'll learn how to make a simple yet eye-catching tiki torch stand. an easy tips

68+ Stunning DIY Laundry Room Storage Shelves Ideas

Cat window hammock DIY